Revised March 2021
Safety for all sanding machines
- No loose clothing, ties, scarves, gloves, or hair.
- Always wear a dust mask and safety glasses.
- Check the condition of the abrasive and machine. If a part is missing, bent, torn, worn or is not operating properly report this to the shed boss/SIG coordinator.
- Check your work for foreign objects (metal, nails etc) and make sure the work area is free of tools and accessories/guides not in use.
- Never leave the sander running unattended. Turn all motors off and ensure the sander has come to a complete stop before making adjustments.
- Ensure your work is well secured (held firmly) and
– be conscious of the direction of feed
– avoid distraction and keep fingers clear, as abrasives can remove skin quickly!
– check no one is in the line of fire should you lose control of your work piece. - Clean abrasive regularly. Always sweep up dust on floor to avoid slip hazard.
- Pushing stock hard against abrasive, can cause heat build-up, gumming up of abrasive, burning and snipe (gouges). Make many light passes to achieve desired level of finish.
- Never ever use a sander without dust extraction. Close gates after use.
- Do not use sanders to remove/finish removing varnish, paint or glue.
Drum sander
Purpose
The Drum Sander is a finishing tool, not an alternative to the thicknesser. Its primary function is to remove minor imperfections left by hand planning or thicknessing wood and preparing the surface for hand sanding through higher grits.
- The drum sander is not to be used as a quick way to remove glue, varnish, paint or other finish. Excess glue is to be removed before putting a piece through the sander.
- Where material to be removed is significant (e.g. to make a work piece thinner, to even up glued boards) you are wasting your time and wearing out abrasive using the drum sander. Use the thicknesser, hand plane or hand sander especially if work piece is thin.
Safety (in addition to the above safety measures common to all sanding machines)
- When sanding short lengths do not place them on the drum sander conveyor belt with your fingers on the underside. The rollers force the timber down and it can trap your fingers.
- Except for cleaning the abrasive, the drum cover must not be opened when the drum is rotating.
- Turn off the belt feed when cleaning the drum to avoid catching clothes.
- Avoid heavy cuts and grits not suited to the job.
- Timber less than 5mm thick must be placed on a sled. Use a sacrificial backstop or, better still, attach work to sled with double sided tape at front.
- Never operate the sander with the drum touching conveyor belt or when the belt is not centred on the roller.
Components and basic operations
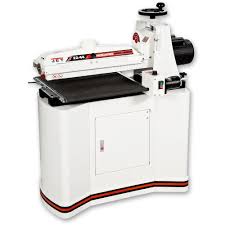
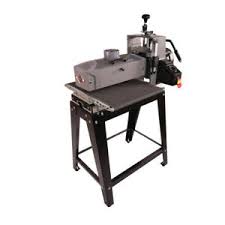
- The main parts are: the conveyor (feed) belt, drum cover, drum to which abrasive is rolled around and attached using a clip lever, pressure-rollers, and height adjuster.
- The controls: on and off (green and red) switch, feed belt variable speed switch, height adjuster (macro arm and micro handle), and a drum oscillation on/off switch (Jet Sander only).
- Abrasive – The Guild uses 80 and 100 grit. Always inspect abrasive before use and note location of any wear/damage. Ridging is an indication of damaged abrasive. Avoid worn areas. Length and shape of taper of the abrasive vary between the sanding machines and is critical for a tight fit. The Jet has a tensioning tool to help hold open the abrasive catch – fingers do the job otherwise.
- Setting drum height. Place thickest part of workpiece under drum and using height adjusters lower drum to just touch workpiece. TIP: Open dust cover, rotate drum by hand while winding height adjuster until the drum will no longer rotate (i.e. abrasive is touching workpiece) – start height. Back off by winding adjuster one full revolution the other way, remove wood from under drum, then rewind back down again to start height (almost one revolution).
- Turn on conveyer (40-50 feet/sec mark is often used), turn on sander (green button under Red safety cover) and place workpiece on conveyer. Listen for feathering sound. Vary where you run the timber through the sander before readjusting height of drum so as to even out wear on the abrasive.
- A quarter turn of the height adjuster (approx. 0.4mm – 1/64 inch) is recommended between passes. Do not change the height between passes until both halves have been done, when processing pieces wider than the sander drum. Very light sanding increments at high speed reduces the risk of burning timber, especially for timbers susceptible to burning
- Support wide and long lengths of timber in and out of the drum sander. Snipe is possible if the workpiece isn’t parallel to the conveyor as it enters the sander.
General
- Clean the abrasive regularly to prevent from it choking up. Some timber/abrasive combinations are prone to choking (e.g. resinous woods). Better to clean too often than not often enough. Crepe blocks are provided for this purpose. Always clean on finishing job.
TIP – If using abrasive with a burn mark, place a small piece of masking tape on the drum cover in line with the burn mark so that you can avoid it. Do not use pencil or a marker as these will still be in place when the abrasive is changed. - Finger entrapment is a real risk if you leave your fingers under your workpiece as you support it onto the conveyor. Hold shorter pieces from the sides and longer pieces well back.
- When edge sanding, if the bottom edge is not square to the timber face then the sanded face will also be off-square.
- If feathering sound of abrasive comes and goes your workpiece is not flat; make sure you put the thickest part through first before adjusting the height of the drum otherwise you may over work the sander.
- Trying to remove too much in one pass is the main reason that abrasives burn or produce a resin streak which reduces their usefulness/effectiveness.
– Slight skewing of workpiece on the belt feeder helps avoid burning in some cases.
– A light dusting of talcum powder on easily burnt timber before each pass is said to reduce the risk of burning too. - If you try to take off too much in one pass the INTELLISAND feature may activate. It protects the motor from overloading by slowing the speed of the conveyer but increases the how long the workpiece is presented to the abrasive and so chance of burning. This may also cause a groove (snipe) in your workpiece.
- Tat! Tat! Tat! Tat! This noise is caused by the abrasive at the end of the drum hitting the feed belt. Stop immediately and re-tension the abrasive. Alternatively, the timber piece may be less than 5mm thick and require a sled.
- On the Jet Drum Sander, the outer end of the sanding drum is set a fraction higher than the inside end so that a groove is not sanded into boards greater than 22″ (560 mm) in width. Easier to hand sand out a slight ridge than a groove. Regularly swap the leading end of your timber through the sander to reduce the effect of the drum’s slope. Conversely, the SuperMax sander drum is set parallel to the conveyor belt.
- Do not lean on the free end of the drum – you will end up with a heavier cut than you were planning! (This is especially the case for the SuperMax)
- Remember, secure loose clothing. The feed belt on a drum sander can grab loose items of clothing e.g. a loose wind cheater or a sleeve of a jumper.
- If you have any doubts about using the sander seek assistance/advice.
- Members can supply their own abrasive but need first to see the shed boss or member of the maintenance team. Use your own abrasive when removing glue or other non-wood matter.
- For glued-up panels that are too wide for the thicknesser, clean off exuded glue before sanding and skew the timber through the sander.
- A straight sanding pass over extruded glue will almost certainly ruin the abrasive. Coarse abrasives such as #80 work better than fine abrasives for cleaning remaining glue.
Additional information
Checkout a video presentation on the Guild’s Jet 22-44 Oscillating Drum Sander.
Checkout a video presentation on the Guild’s Super Max Drum Sander.
Manual for the SuperMax 16-32 Drumsander 08/2017


Spindle sander
Purpose
Spindle sanders are designed to help sand curves, rounded edges, and odd angles.
Safety (in addition to the above safety measures common to all sanding machines)
- Do not use a worn out or torn abrasive sleeve. This can lead to heat build up and damage the rubber drum.
- There is a real risk of losing control of the work piece. Use table surface and a firm grip to maintain control.
Components and basic operation
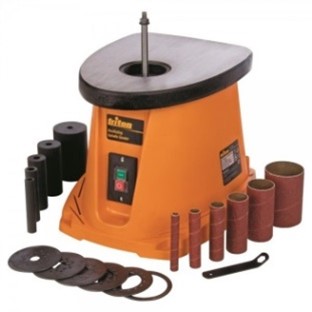
- The spindle sander comprises a vertical spindle, plastic table inserts, abrasive cylindrical sleeves fitted over matching rubber drums of varying diameters which slip onto the spindle, and three different sized washers which sit on top of the drum on the spindle, and a lock nut which secures the drum and abrasive sleeve in place. There is a lower spindle washer (which is fitted over the spindle with the grooves facing upwards) – this should not be removed.
- The spindle rotates anti clockwise and oscillates up and down – under no load it can attain 2,000 revs per minute (rpm) and 58 oscillations per minute (opm).
- A dust port at the back connects to the dust extraction system. Open the gate and turn on extraction switch on wall to left of machine.
- Tightening the washer using a locking nut compresses the rubber drum so that it ‘grips’ the abrasive sleeve. If the sleeve rotates on the drum when switched on, the nut hasn’t been tightened enough to compress the drum adequately. Try to avoid over-tightening the lock nut
- There are different table inserts for each drum (see chart on right). The insert must be flush with the table. It is important to select the correct Table Insert to match the drum/sleeve size selected. Incorrect selection may lead to over-heating and damage.
- Feed the workpiece gradually, AGAINST the direction of rotation, onto the sanding sleeve. Failure to do this could force the workpiece away from the sanding sleeve with risk of injury. Do not force the workpiece or apply excessive force.
- Clean abrasive regularly.
- While a dust extractor is connected to the sander it may be necessary to periodically remove any accumulation of dust under the lower washer. If dust is collecting around the work space, check the extractor is turned on/working properly. Leave machine and bench tidy.

Sanding Sleeve Diameter |
Table Insert Size |
Upper Spindle Washer Size |
Rubber Drum Size |
|---|---|---|---|
13mm |
13mm |
Small |
None |
19mm |
19mm |
Medium |
19mm |
26mm |
26mm |
Medium |
26mm |
38mm |
38mm |
Large |
38mm |
51mm |
51mm |
Large |
51mm |
76mm |
76mm |
Large |
76mm |
Belt and Disc sander (Linisher)
Purpose
Belt and disc sanders are used for smoothing, shaping and in some cases polishing work pieces. A linisher is a belt and disc sander combined in one.
Safety (in addition to the above safety measures common to all sanding machines)
- The Guild linisher is not to be moved – doing so impedes access to the turning room.
- Both the belt and the disc sanders turn on when the power switch is activated. Make sure others nearby know you are about to turn it on. Ensure the work surface is clear of tools and anything other than the work piece.
- Do not operate both belt and disc sanders at the same time. This may overload the motor.
- Kickback is a real risk. Ensure a firm grip on work piece and use table of disc sander and metal guard on belt sander to aid control.
- Only ever use the belt in front of the upright (black metal) guard (end not near on/off switch).
Components and basic operations
- The linisher comprises a motor that drives a continuous belt of abrasive around rollers and spins the disc with abrasive attached by a hook and eye system around. It has an on/off safety switch and dust port connected to the main dust extraction system. There is also a larger disc sander in the machine room connected to the same dust extraction system as the spindle sander.
- The disc sander has a table which is usually set at 90 degrees to the abrasive surface but which can be adjusted to wider angles. It provides a vertical sanding surface. The belt sander which rotates at around 1400 revolutions per minute, presents a flat horizontal sanding surface.
- Allow the machine to reach maximum speed before using to avoid overloading the motor.
- Don’t use on small work pieces because it is difficult to hold them securely.
- Caution. The linisher disc sander rotates in a clockwise direction, so you use the right side of the disc/table. The larger stand alone disc sander rotates in the opposite direction (anticlockwise) and so is operated from the side left of centre.
- Never put work pieces on the belt sander behind the black metal guard (ie switch end of belt).
- Stay alert. Keep fingers well clear of, don’t lean over or stand in direct line with the moving abrasive (especially the belt). Make sure sleeves are tight and nothing is dangling in the way. These machines are unforgiving.
- Plan your action – where and how much you wish to remove, how to best maintain control and whether to use the disc or belt. It is easy to unflatten a flat surface on the linisher.
- Pressing harder will take more off quicker but it is also more likely to burn your work or result in grooves you hadn’t planned.

